What are your opinions regarding Tools You Need to Install a New Bathtub ?
Installing a bath tub isn't exactly rocket science, but it does call for strong plumbing, woodworking, and also sometimes, tiling abilities. Replacing an old bath tub with a brand-new one is also a moderately difficult project. If the old tub is readily available, the job can move quickly; if you have to open up a wall surface to remove the old bathtub and also place the new bathtub, the task is much harder. In either case, the project is within a home handyman's skills, although you will need a helper to leave the old bathtub and embeded in the brand-new one. Make sure you have actually certified yourself for the task as well as are comfortable trying it. As opposed to working with a professional to take over a halfway-completed job, it is far better to take into consideration using one prior to you begin. Chances are you may require a specialist plumber to make tube links.
This write-up will certainly aid you install a brand-new bathtub in your bathroom if you have already purchased a new tub and don't need to change the arrangement of your previous water supply pipes.
Your tools and material checklist must consist of the following:
- New Bathtub
- Hammer
- Pipe Wrenches
- Prybar
- Safety Glasses
- Degree
- Pliers
- Flexible Wrench
- Putty Blade
- Screwdriver
- Cold Blade
- Measuring tape
- Pipe Caps
Getting ready for the Installation
Firstly, the sustaining structure provided with the bath ought to be fitted (if required) according to the maker's directions. Next, fit the taps or mixer to the bath tub. When suitable the tap block, it is essential to ensure that if the tap features a plastic washer, it is fitted between the bathroom as well as the faucets. On a plastic bathroom, it is likewise practical to fit a supporting plate under the taps unit to stop pressure on the bath tub.
Fit the versatile tap ports to the bottom of the two taps making use of 2 nuts and also olives (often provided with the tub). Fit the plug-hole outlet by smearing mastic filler round the sink electrical outlet hole, and after that pass the outlet through the hole in the bathroom. Utilize the nut supplied by the producer to fit the plug-hole. Examine the plug-hole electrical outlet for an inlet on the side for the overflow pipeline.
Next, fit the end of the versatile overflow pipe to the overflow outlet. Afterwards, screw the pipeline to the overflow face which ought to be fitted inside the bath. Make sure you make use of every one of the provided washing machines.
Link the trap to the bottom of the waste electrical outlet on the bath tub by winding the thread of the waste outlet with silicone mastic or PTFE tape, and also screw on the trap to the outlet. Attach the bottom of the overflow tube in a similar manner.The bathroom ought to now prepare to be fitted in its last setting.
Removing Old Taps
If you require to replace old faucets with brand-new ones as a part of your installation, after that the first thing you ought to do is disconnect the water. After doing so, switch on the taps to drain any kind of water staying in the system. The procedure of eliminating the existing taps can be fairly problematic as a result of the restricted accessibility that is commonly the case.
Make use of a basin wrench (crowsfoot spanner) or a faucet tool to reverse the nut that connects the supply pipelines to the taps. Have a fabric ready for the continuing to be water that will certainly come from the pipelines. When the supply pipelines have actually been eliminated, make use of the exact same device to loosen the nut that holds the faucets onto the bath/basin. You will require to stop the solitary faucets from turning throughout this process. When the faucets have been gotten rid of, the holes in the bath/basin will need to be cleaned of any old sealing substance.
Before proceeding to fit the new faucets, compare the pipeline links on the old taps to the new faucets. If the old taps are longer than the brand-new taps, after that a shank adapter is needed for the new faucets to fit.
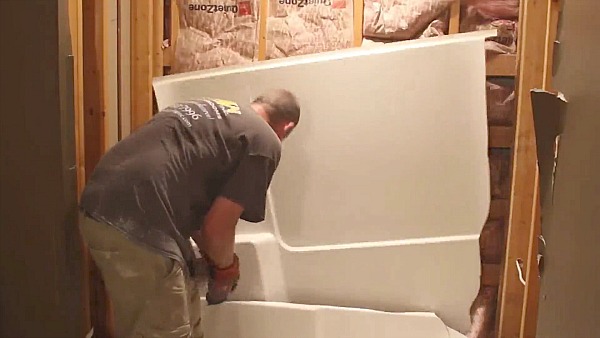
Setting up the Bath tub
Making use of the two wood boards under its feet, place the bathtub in the needed setting. The wooden boards are practical in evenly spreading the weight of the tub over the location of the boards rather than concentrating all the weight onto four little factors.
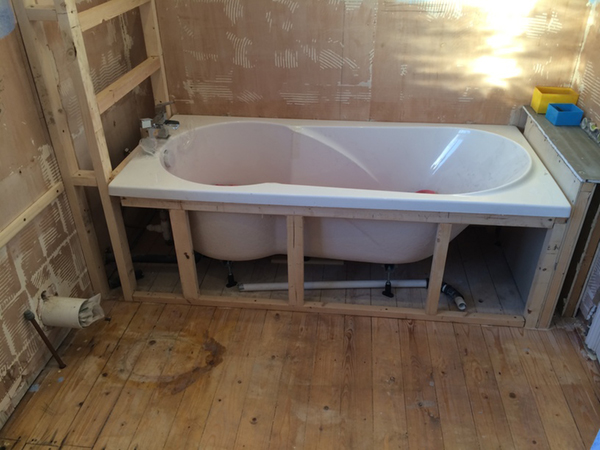
The next goal is to make certain that the bath tub is leveled all round. This can be achieved by inspecting the level and also adjusting the feet on the tub till the level reads level.
To mount faucets, fit the bottom of the furthest versatile faucet adapter to the appropriate supply pipe by making a compression sign up with; after that do the very same for the other tap.
Turn on the water and check all joints and new pipework for leakages and also tighten them if required. Fill up the tub and also check the overflow outlet as well as the typical electrical outlet for leaks.
Lastly, take care of the bathroom paneling as explained in the maker's instruction manual. Tiling and also securing around the bath tub needs to wait till the tub has actually been utilized a minimum of once as this will settle it right into its last setting.
Fitting New Touches
If the tails of the brand-new faucets are plastic, after that you will need a plastic connector to prevent damage to the string. One end of the adapter fits on the plastic tail of the faucet as well as the other end gives a link to the existing supply pipes.
If you need to fit a monobloc, then you will certainly call for minimizing couplers, which links the 10mm pipe of the monobloc to the basic 15mm supply pipeline.
Next, position the faucet in the installing hole in the bath/basin ensuring that the washing machines remain in location between the tap as well as the sink. Secure the faucet in position with the producer given backnut. When the tap is firmly in position, the supply pipes can be connected to the tails of the faucets. The faucets can either be connected by utilizing corrugated copper piping or with regular tap ports. The former type needs to be connected to the tap finishes first, tightening just by hand. The supply pipes can later be attached to the other end. Tighten up both ends with a spanner after both ends have actually been connected.
Tiling Around the Bath tub
In the location where the bath fulfills the ceramic tile, it is necessary to secure the joins with a silicone rubber caulking. This is important as the installation can move sufficient to break a rigid seal, creating the water to penetrate the wall surface in between the bathroom and the tiling, bring about problems with wetness as well as possible leakages to the ceiling below.
You can pick from a variety of coloured sealers to assimilate your fixtures and also fittings. They are marketed in tubes and cartridges, and also are capable of securing gaps approximately a width of 3mm (1/8 inch). If you have a bigger gap to fill, you can load it with twists of drenched paper or soft rope. Remember to constantly fill the bath tub with water prior to sealing, to permit the movement experienced when the bathtub is in use. The sealer can split rather very early if you do not take into consideration this activity prior to sealing.
Additionally, ceramic coving or quadrant floor tiles can be used to edge the bathroom or shower tray. Plastic strips of coving, which are easy to use and also cut to dimension, are also quickly available on the market. It is suggested to fit the tiles making use of water-resistant or water resistant glue and grout.
How to Install a Freestanding Bathtub?
Installing a freestanding bathtub or any kind of bathtub is not a difficult task if you have a sophisticated guide on installing a freestanding bathtub in your bathroom. Aside from getting the freestanding bathtub to your bathroom, you can do all the work without paying a plumber. A bathroom with a bathtub is a retreat where you can feel the sensation of coming home and soaking in that hot water. It is a great way to remove all the stress from your day.
This guide will walk you through installing a freestanding bathtub in simple steps and help you find relief.
Slope
Make sure your bathroom has a proper slope. If your floor lacks a slope, the water flow to the drain will not function, which leads to a blocked drain which can cost you money. You can use the level device to see your bathroom's vertical and horizontal aspects. Once you have that information, you must carry out the next step.
Placement
A freestanding bathtub has a unique characteristic that helps you bring elegance to your bathroom. A freestanding bathtub comes in various sizes and shapes suitable for different types of bathrooms.
According to the information you gathered from the level device, you must pick a bathtub that suits your style and fits your bathroom aesthetically. You can place a freestanding bathtub virtually anywhere, such as in the corner, near the wall, or even at the center of your bathroom. However, you must ensure proper plumbing where you want to install the tub. If not, then you must call a plumber.
Clean the bathroom floor
After deciding where to place the bathtub, you must clean the entire bathroom floor so that the dust and debris do not accumulate underneath the tub. Simple cleaning is enough, and you will clean it again after the installation.
Steps to Install a Freestanding Bathtub:
STEP 1: Place the protective blanket in the adjacent area where you want to install the bathtub. It will help you protect the bathtub's sides when you do the installation.
STEP 2: Now, place the 4x4 lumber in the area where you want to install the bathtub. Place the bathtub on top of the lumber, and align the drain line with the bathtub drain.
STEP 3: A freestanding bathtub comes with a drain kit. If not, make sure you purchase one with your bathtub. You can pop that drain kit and align it with your bathroom drain line. Ensure that you tighten the drain nut enough so there is no water leakage. You must also clean the bathtub’s drain to remove the factory dirt and debris.
STEP 4: Clean the drain hole in your bathroom. It helps to do the installation without any water blockage. A drain cleaner or bleach will suffice. Once the drain dries entirely, take a small amount of clear silicon and place it around the underside of the pipe flange.
STEP 5: Attach the drain tailpiece to the bottom of the bathtub. Place the rubber or plastic bushing with the plumbing material at the top of the tailpiece and screw the drain nut up the tube until it tightens both the bathtub’s drain and the drain tailpiece. Now you must add the lubricant to the seal to ensure there is no water leakage in the pipe connection.
STEP 6: Place caulk around the bottom edge of the bathtub. Take out the lumbar support and carefully bring the bathtub to the floor. Use a damp cloth to clean the excess caulk and debris and plumber putty to cover the tub drains and the floor.
Tips to Maintain a Freestanding Bathtub:
- Always look for the clog in the drain. You can pull it out with a small stick if hair or debris is in the gutter.
- Use mild cleaning components, which will help you preserve the bathtub for a long time and will also help you remove surface-level scratches.
- Do not use strong solutions such as concentrated bleach to remove stains. Instead, mix water and diluted bleach with a ratio of 10:2, respectively. Apply it to the tub's surface and leave it for 15-20 minutes to remove any surface-level stains.
- Always check the floor drain. You may unclog it using any small sticks or a small vacuum to suck out all the debris.
- Check the heater or faucet immediately if you smell rust or grease in the water. Rust in the water may stain or damage the bathtub in the long run.
- If you want to sand the bathtub, try using 400 grit sandpaper or 600 grit sandpaper for a more refined finish.
I stumbled upon that write up about How to Install a Bathtub: Install an Acrylic Tub and Tub Surround while scouting around the search engines. Do you know about another person who is in the market for the niche? Please feel free to promote it. Thank you so much for your time spent reading it.
Website
Comments on “Just How to Remove as Well as Replace a Tub”